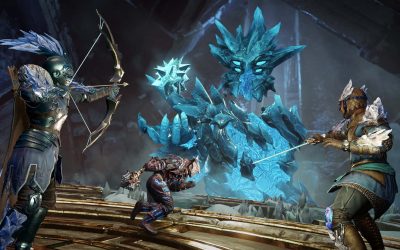
The Winter Rune Forge is a 10 man trial in New World. This guide will walk you though everything you need to know to complete the trial.

Brewmaster
Sword & Shield – Dagger
Sword & Shield – Crossbow
Armor Guide
Buffs Debuffs and DoTs
Camp Guide
Crit Chance & Crit Damage
Combat Trophy Guide
Corrupted Breach Guide
Consumables
Equip Loads
Faction Guide
Fast Travel Guide
Housing Guide
How to Increase Storage Capacity
Luck
Perks and Perk Labels
Salvage & Repair
Territories & Settlements
Timeless Shards
Trade Skill Aptitude
Weapon Perks & Their Crafting Mod
Check out our Interactive Map with custom placed nodes for gathering and more!
The Winter Rune Forge is a 10 man trial in New World. This guide will walk you though everything you need to know to complete the trial.
Everything you need to know including drops, boss strategies, and a complete walkthrough of the Glacial Tarn Expedition in New World.

This is a New World Great Sword PvE DPS Build guide. This guide covers all of the gear, consumables, and more you’ll need to run the build.
This is a New World Butcher Spear PvE DPS Build guide. This guide covers all of the gear, consumables, and more you’ll need to run the build.

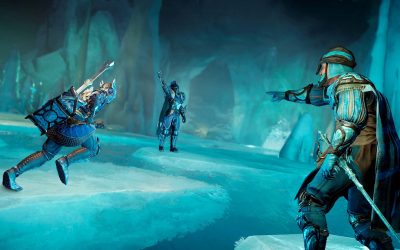
Everything you need to know including drops, boss strategies, and a complete walkthrough of the Savage Divide Expedition in New World.
Our Ice Gauntlet Rapier DPS Build pairs the Rapier and Ice Gauntlet together in one of the most potent PVE DPS builds in New World.